Why Git is used for?
Git is a version control system developed by Linus Torvalds. It provides us a variety of features like keeping the track of a code base giving us traceability, switching to the previous or future versions of the codebase (if any), maintains a log file storing the data of the contributor, etc.
Starting with Git
To use git, just simply download it from the web by the help of a browser of your own choice.
Now open your terminal and navigate to the file or folder you want to track with the help of Git. After that and write the following command: git init . This command will initialize your corresponding file/folder with the git software and from onwards every change you make within the file, will be tracked by Git.
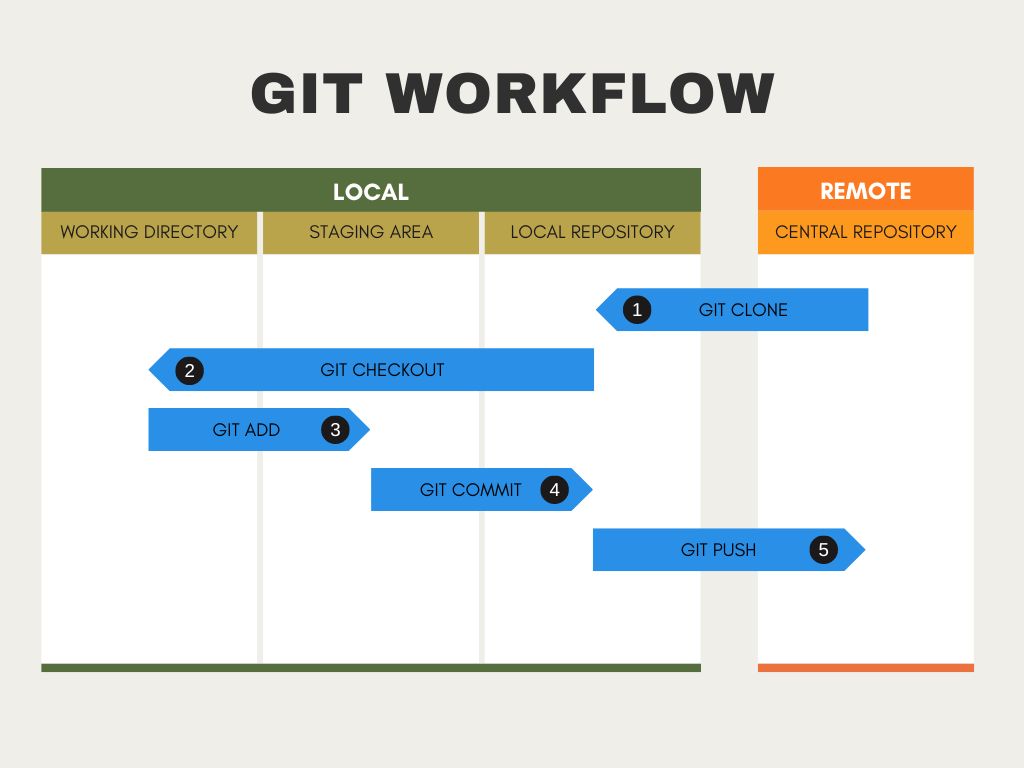
Generally, there are four main Git operations that everyone should know:
git init
git add filename
git commit -m “message“
git push
We have already discussed the init command, now let’s discuss the rest of them.
The git add command takes all your changes to an area called as staging area. The staging area is a phase in which you are telling the git software that, these things are ready to be committed.
And now, you will be questioning that what is the meaning of commit?? Commit is nothing but simply means tracking our code. In more simpler way, it is basically taking the snap shot of our current code and storing them with some data and a message attached to it.
Further you may ask, why are we doing it in a two step process, can’t we just omit the git add command and directly commit them. Well it is partially true, but when we are working with a large code base, or professional environment, we are required to do the work in phases, so that it will be easy for others to understand what we had changed and what is the purpose of it. It is also a safer option because if we want to change something, we can edit it at the moment before committing it.
(Note: If there are multiple files to add, instead of writing all the file names, simply write git add . to add all the files to the staging area)
Now the next step is to commit all the files waiting in the staging are as we discussed before. Here’s the command: git commit -m “message“. Remember that when we make a commit, we have to always add a message with it so that it will be easy for us and our fellow contributors to know what the commit was about.
(Note: Generally the message we write with the commit command should be in present tense. For ex: git commit -m “fix navigation tab“)
At last, we use the push command as git push to push all our changes to our web repository(fancy name for folder). These repositories and stored on web by popular sites like GitHub, GitLabs, Bitbucket, etc. These sites helps us to track our code and collaborate with our fellow contributors online.
Some of the other popular git commands are:
git log, git status, git clone, git branch, etc.
Comments
Join the discussionNo comments yet. Be the first to comment.
Assignments
In this series, I will be writing articles about all the things I learn from the cohort of ChaiAurCode platform, mentored by Hitesh Choudhary sir.